
Lesson 11: Passing variables with forms
Interactive websites require input from users. One of the most common ways to get input are with forms.
In this lesson, we will look at how to build forms and process inputs on the server.
<form>
When you code a form, there are two particular important attributes: action and method.
- action
- Is used to enter the URL where the form is submitted. It this case it would be the ASP file that you want to handle the input.
- method
- Can either have the value "post" or "get" which are two different methods to pass data. At this point, you don't need to know much about the difference, but with "get", the data is sent through the URL, and with "post", data is sent as a block of data through standard input service (STDIN).
An HTML page with a form
The page that contains the form doesn't need to be an ASP file (but it can be). It need not even be on the same site as the file that will receive the data.
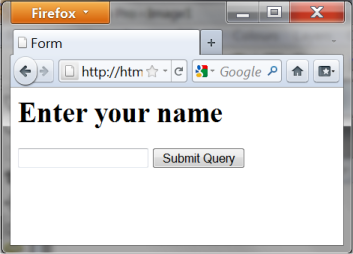
In our first example, we will look at a very simple form with one text field:
	<html>
	<head>
	<title>Form</title>
	</head>
	<body>

	<h1>Enter your name</h1>

	<form method="post" action="handler.asp">
	<input type="text" name="username">
	<input type="submit">
	</form>

	</body>
	</html>
The result in the browser is a form:
Now we come to the fun part: receiving and handling the data with ASP.
Requesting form data with ASP
When you need to request data from a form - and many other places (we will come back to that) - you use the object request. Since our data was submitted through a form using the method "post", we write:
Request.Form("fieldname")
Which returns the value of the text field in the form. Let us try to use it in an example.
First create a page with a form as above. Then make an ASP page named "handler.asp" (notice that this is the name of the page we wrote in the action attribute in our <form>).
The file "handler.asp" shall have the following content:
	<html>
	<head>
	<title>Form</title>
	</head>

	<body>
	<%
	Response.Write "<h1>Hello " & Request.Form("username") & "</h1>"

	%>
	</body>

	</html>
User input and conditions
In the next example, we will try to use user input to create conditions. First, we need a form:
	<html>
	<head>
	<title>Form</title>
	</head>
	<body>

	<form method="post" action="handler.asp">

	<p>What is your name:</p>

	<input type="text" name="username"></p>

	<p>What is your favorite color:
	<input type="radio" name="favoritecolor" value="r" /> Red

	<input type="radio" name="favoritecolor" value="g" /> Green
	<input type="radio" name="favoritecolor" value="b" /> Blue </p>

	<input type="submit" value="Submit" />

	</form>

	</body>
	</html>
Which will look like this in the browser:

Now we will use these inputs to create a page that automatically changes background color according to what the user's favorite color is. We can do this by creating a condition (see lesson 6) that uses the data the user has filled out in the form.
	<%
	strHeading = "<h1>Hello " & Request.Form("username") & "</h1>"

	Select Case Request.Form ("favoritecolor")
	Case "r"
		strBackgroundColor = "rgb(255,0,0)"
	Case "g"
		strBackgroundColor = "rgb(0255.0)"

	Case "b"
		strBackgroundColor = "rgb(0,0,255)"

	Case Else
		strBackgroundColor = "rgb(255,255,255)"
	End Select
	%>

	<html>
	<head>
	<title>Form</title>

	</head>
	<body style="background: <% = strBackgroundColor %>;">

	<% Response.Write strHeading %>

	</body>
	</html>
The background color will be white if the user has not chosen any favorite color in the form. This is done by using Case Else to specify what should happen if none of the above conditions are met.
But what if the user does not fill out his name? Then it only says "Hello" in the title. We will use an extra condition to change that.
	<%
	strUserName = Request.Form ("username")

	If strUserName <>"" Then

	    strHeading = "<h1>Hello " & strUserName & "</h1>"

	Else
	    strHeading = "<h1>Hello stranger!</h1>"

	End If


	Select Case Request.Form ("favoritecolor")

	Case "r"
		strBackgroundColor = "rgb(255,0,0)"
	Case "g"
		strBackgroundColor = "rgb(0255.0)"
	Case "b"

		strBackgroundColor = "rgb(0,0,255)"
	Case Else
		strBackgroundColor = "rgb(255,255,255)"
	End Select
	%>

	<html>

	<head>

	<title>Form</title>
	</head>
	<body style="background: <% = strBackgroundColor %>;">

	<% Response.Write strHeading %>

	</body>
	</html>
In the example above we use a condition to validate the information from the user. In this case, it might not be so important if the user did not write his name. But as you code more and more advanced stuff, it's vital that you take into account that the user may not always fill out forms the way you had imagined.